Basic Origami Birdbase

This is a very common base form for Origami and you can fold many models based on it.


Start with a Preliminary Base, the open end pointing to yourself.


Introduction-To-Basics-Origami-Birdbase-1
1. Petal fold the top layer upwards.


Introduction-To-Basics-Origami-Birdbase-2
2. Repeat step 1 on the other side.


Introduction-To-Basics-Origami-Birdbase-3
3. The finished birdbase.


Starting from the birdbase you can create some great creation. And the most common is The Traditional Crane / Origami Bird.


Introduction To Basics Origami Preliminary Base

Here you are gonna learn how to fold the Preliminary Base. Many models use this base as a starting point.


Introduction-To-Basics-Origami-Preliminary-Base-1
1. Start with a square sheet of paper and valley fold it in halfes.


Introduction-To-Basics-Origami-Preliminary-Base-2
2. Precrease and squash fold. Turn model over side to side.


Introduction-To-Basics-Origami-Preliminary-Base-3
3. Precrease and squash fold.


Introduction-To-Basics-Origami-Preliminary-Base-4
4. The finished Preliminary Base

Introduction To Basics Folds Origami

On this page I will show you the basic technics for Origami. Don't worry if you don't manage or understand how to do one of the following folds at once. After having folded some models you will know them all by heart. It's all a question of practice.


Valley Fold


Introduction-To-Basics-Folds-Origami-Valley-Fold
The valley fold is formed by folding the paper toward oneself. An arrow shows where to fold the piece of paper to.
Symbol: dashed line


Mountain Fold


Introduction-To-Basics-Folds-Origami-Mountain-Fold
The mountain fold is formed by folding the paper away from oneself.
Symbol: alternating dashed and dotted line


Introduction to Basics Origami Diagrams

In the many years that Origami diagrams have been in existance, some standards on how to draw them have been developed. The Yoshizawa-Randlett system, which is accepted as an international standard, was first created by Akira Yoshizawa and then refined by Samuel Randlett and Robert Harbin.

Even though these standards exist there are still many variations in each individual diagramming style. I will try to present the most common symbols and variations here. This should help you to find your way through most Origami diagrams you come across.
You will find most of the symbols shown here again in the section Basic Folds, where they will probably make more sense in context.


Often (but unfortunately not always) the "paper" shown in diagrams will have a white side and a coloured side, like standard Origami paper (Kami). If this is the case you sometimes find a symbol which shows whether you should start with the coloured side up or the white side up.

Coloured-Side-Up


White-Side-Up


How To Make Origami Firework (Yami Yamauchi)

Quilling Origami

Quilling is an easy paper craft that requires minimal tools. It produces amazing results which can be used for decorating birth announcements, wedding invitations, and other embellishments.


quilling-Yellow-Flower

The art of twirling paper started during the Renaissance when nuns decorated bibles and religious texts with swirly strips of paper. Back then, they used feathers (quills) for writing and it is believed that they rolled the strips of paper around the quill - thus the term "quilling".


Quilling Origami Instructions : Quilling Color Change

This page explains how you can change the color of your quilling paper.


Quilling-Origami-Instructions-Quilling-Eyes-Color-Change


  1. Get two or more strips of paper and cut them to size. If you use two strips of the same length then the inner color will appear to occupy more space than the outer color because the diameter of the inner circle is smaller.
  2. Glue the strips end-to-end. Be sure to keep them straight relative to one another.
  3. Insert the paper into a slotted quilling tool and roll as usual. The end that is inserted into the tool will be the inner color.
Changing the color of the quilling paper is useful in making eyes, the center of flowers, and car tires. 

More about Quilling Origami Instructions


Quilling Origami Instructions : Quilling Scrolls

Learn how to make quilling scrolls. These swirly, curly strips of paper can be used to enhance and decorate greeting cards and picture frames.


A quilling scroll is different from a quilling coil. Coils are held together with glue whereas scrolls are left loose. As a consequence, these strips of paper have a very airy feel to them. They are used in conjunction with coils. For example, a scroll can be the stem that connects the flower head and the leaves.


There are 4 or 5 basic scrolls:  

Quilling-Origami-How-to-Make-a-Quilling-Scrolls


Quilling Origami Instructions How to Make a Tight Coil

These step-by-step quilling instructions will allow you to make these basic shapes:  

Step-By-Step-Quilling-Instructions-Basic-Shapes


Origami Traditional Crane Or Origami Bird

Origami-Crane-Or-Origami-Bird


Here you are gonna learn, how to fold a crane, which is a traditional model from Japan. This is probably one of the first models I learned to fold. I can't even remember when I folded my first crane, but since then I folded many hundreds of them.

It is an old Japanese believe that if you fold 1000 cranes you'll be granted a wish!

You have to start with a Birdbase.


1. Valley fold the sides (top flaps only) to the middle.


2. Repeat step 1 on the other side


3. Inside reverse fold fold the two flaps up to form neck and tail.


4. Inside reverse fold fold the neck down to form the head.


5. Valley fold the wings down as far as possible.


6. The complete crane. You can shape the body by pushing the top point down, pulling the wings a little bit apart or blowing air into the tiny hole at the bottom of the body.


WHAT IS ORIGAMI ?

Origami is the Japanese word for paper folding. ORI means to fold and KAMI means paper. Together, they form the word, "origami." It is an art form that has been handed down from parent to child through many generations. Origami involves the creation of paper forms usually entirely by folding. Animals, birds, fish, geometric shapes, puppets, toys and masks are among the models that even very young children can learn to make in just one sitting.


Random Image For Unique Origami

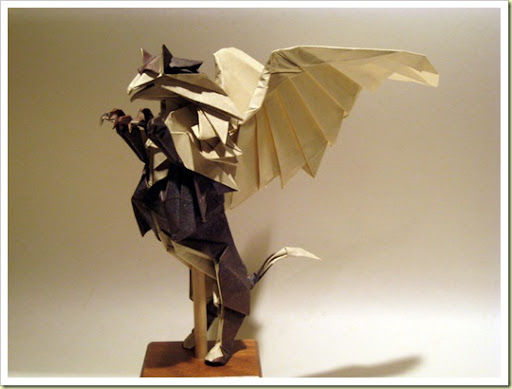
image-jedi-unique-origami image-gundam-robot-unique-origami image-scorpio-unique-origami image-swan-unique-origami image-insect-unique-origami image-gryphon-unique-origami image-headless-warrior-unique-origami image-lion-unique-origami
image-dragonfly-unique-origami

Image Money Unique Origami

money origami

image01 money origami

money origami

image02 money origami

money origami

image03 money origami


money origami

image04 money origami

money origami

image05 money origami

money origami

image06 money origami


money origami

image07 money origami

money origami

image08 money origami
Related Posts Plugin for WordPress, Blogger...